If you’re new to gardening, growing garlic is a great way to get started. You’ll find it to be one of the easiest crops to grow and maintain.
Hard Neck vs Soft Neck
First you will need to identify what type of garlic you’d like to grow. There are “hard neck” and “soft neck” garlic varieties. Hard neck varieties derive their name from the stem the bulbs form around. Hard necks also produce “scapes”, the shoot on top of the plant. These scapes resemble green onions and are can be cooked. Hard necks prefer cooler weather and do not grow as well in the South. Although, I’ve had some success with the Chesnok Red variety. I have found soft neck garlic to grow bigger bulbs in our climate. Soft necks do not produce scapes.
My favorite soft neck varieties are Early Italian & Inchelium Red. As for the hard necks, I grow Purple Glazer and Chesnok Red. I purchase my seeds from Garlic Gods. I highly recommend them for quality and service. And of course, they’re organic. Be sure to order early in the summer as favorite varieties sell out fast.

Chesnok Red hard neck 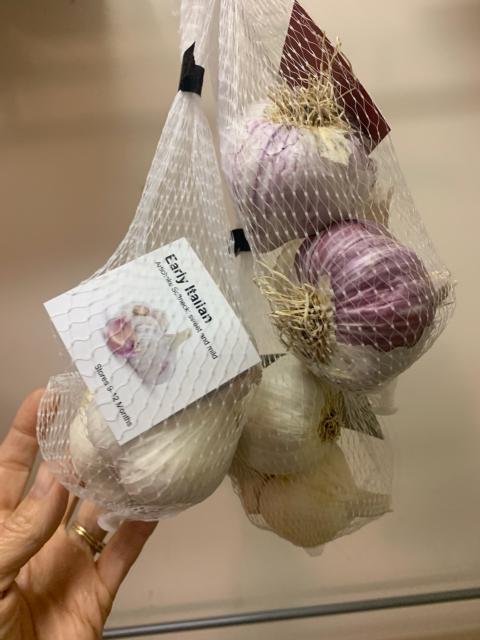
Early Italian soft neck 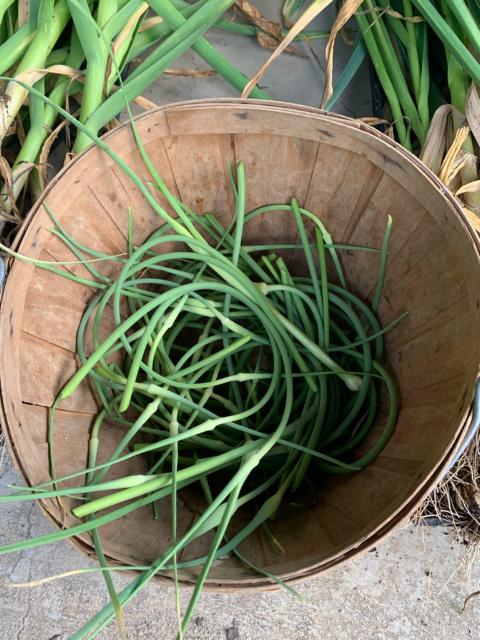
Harvested scapes
When and How to Plant
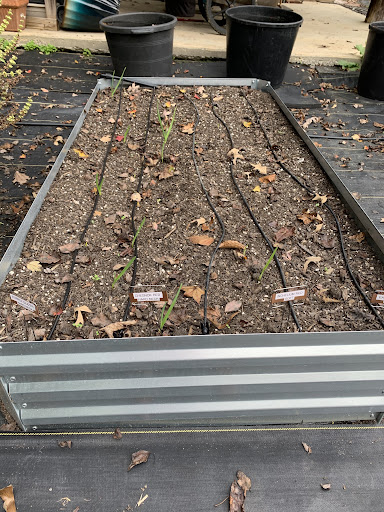
A raised bed is perfect for growing garlic. I use one that is 3′ x 6′. It’s important to refresh the beds before planting every fall, around the middle of October. I don’t replace the soil, just add to the top as it will settle year-to-year. I work in Daddy Pete’s organic potting soil, several scoops of my own organic compost and 4-5 cups of Espoma organic Bio-Tone Starter Fertilizer. When planting you’ll want to break apart the bulbs and plant the single cloves 4-5” apart in a row. Make sure tops are up and roots are down. Push the single clove down into the soil 3-4”. If you have a drip irrigation system, which I strongly recommend, run lines between each row. You will start to see some sprouting soon after planting, but most of the growth will take place in the spring.
Maintenance
I love to grow garlic because there is very little maintenance after planting. Bugs and voles won’t touch it. This is a welcome relief. As an organic gardener who does not use pesticides, bugs are a constant problem with my other crops. Given it’s repellent nature, I’m considering planting some garlic amongst my dahlias next year in an attempt to repel voles (I’ll keep you posted, be sure and subscribe to my newsletter for updates).
Other than pulling the occasional weed, all there is to do is make sure it gets at least 1″ of water per week through the winter.
Harvesting and Storage
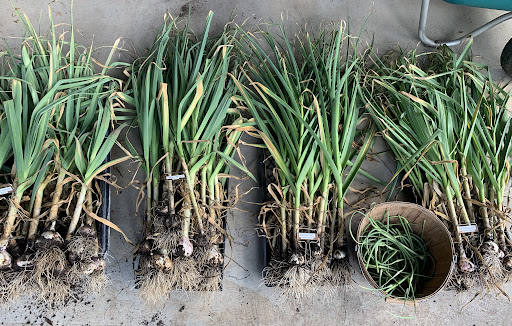
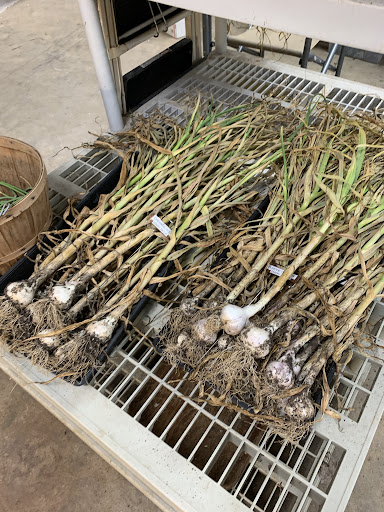
Toward the end of May, you’ll start looking for leaves from the stalk to turn brown and crispy. This means it’s time to harvest your garlic. On hard neck varieties you can also start looking for the scapes. My soil is loose enough for me to gently pull the bulbs out by the stalks, but you may need to use a hand trowel to gently go under and help lift the bulbs. I recommend leaving any caked soil on the bulbs. You want to let the soil dry and remove it later so not to disturb the outer protective skins on the bulbs. I place the harvested plants on vented bottom shelving in my basement and let them dry for several weeks. We have a dehumidifier which helps keep the garlic dry. Otherwise, mold would be an issue.
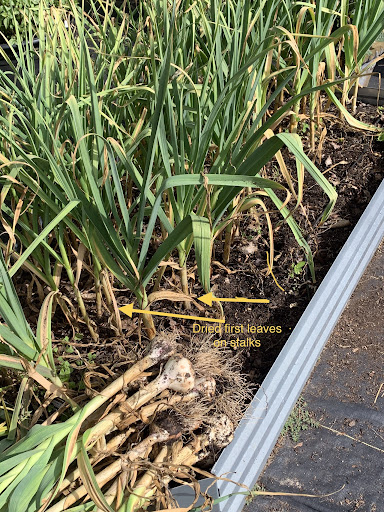
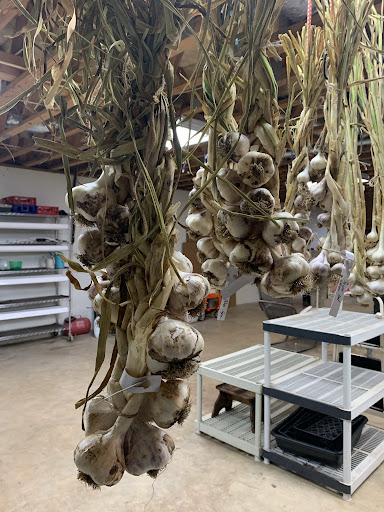
After several weeks, braid the garlic and hang it to finish curing. Once fully cured, it’s ready to enjoy and share with family and friends.
Happy gardening! I look forward to hearing your garlic growing success story!

There are lots of green things growing that look similar to garlic in my garlic beds but when I look closely they’re much thinner stalks. I started pulling them up but am wondering what they are.
Great article!